

Framer Cookie Banner & Google Tag Manager: Common implementation mistakes to avoid
Jan 23, 2026

Framer’s native Cookie Banner component is a solid starting point (official Framer Guide here). It handles the UI and consent logic out of the box. But connecting it effectively with Google Tag Manager so it doesn't mess up your data is a whole different story.
We spent quite some time debugging this setup, so you don't have to. Check out the points below to save yourself a ton of time and avoid those frustrating "why is my bounce rate zero?" moments. Seriously, it’s worth doing this right the first time.
Here is how to make Framer and GTM play nice together.
Avoid the "Double Container" trap
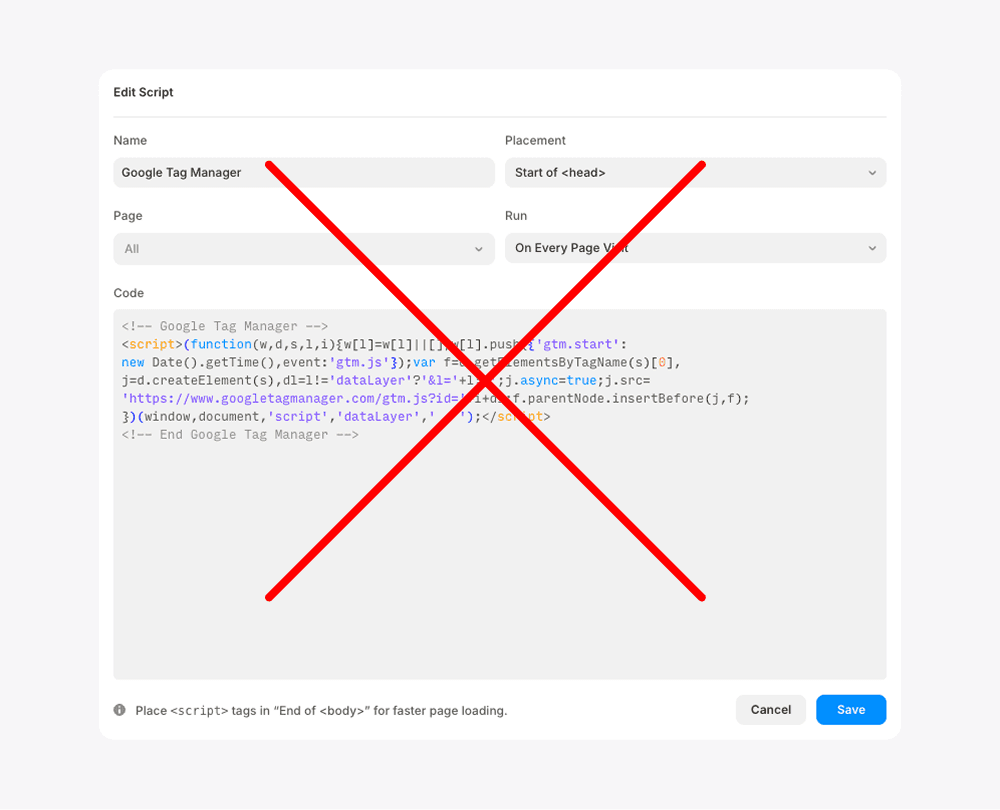
Really important thing here: When you use the official Cookie Banner component, you input your GTM ID directly into the component properties. Framer is smart enough to inject the container code for you automatically.
Don't manually paste the GTM script into the Site Settings (<head> or <body> section) out of habit.
If you do, you are loading the container twice. This results in false page views, false bounce rates and inflated metrics.
Tell your tags to "wait"
By default, GTM triggers like "Initialization" fire the moment a page starts loading. They don't know they are supposed to wait for the user to click "Accept" on your fancy Framer banner.
Even if Framer sets the consent state to 'denied' by default, your tags (like GA4) might still fire if they aren't explicitly told to respect that state.
The fix
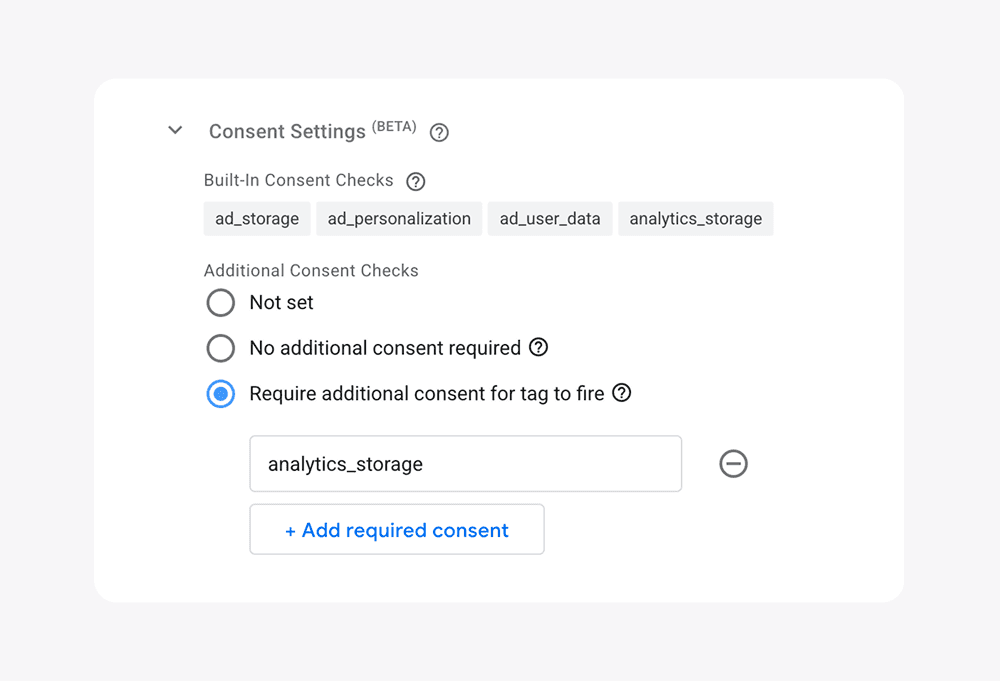
For every tag that requires consent (e.g., Google Analytics 4):
Go to Advanced Settings -> Consent Settings.
Select Require additional consent for tag to fire.
Add the specific parameter (usually
analytics_storage).
Now, even if the trigger says "Go", the tag will stay paused until the consent status changes to 'granted'.
The "second spark": Why the Custom Event is your real gatekeeper?
This is the part where most setups fail. You might think that if you have a Cookie Banner, GTM will just "know" when someone clicks.
The reality: When a user lands on your site, GTM runs its "Initialization" and "All Pages" triggers immediately. At that split second, the user hasn't clicked anything yet, so the tags either fire without consent (bad!) or get blocked and stay blocked even after the user clicks "Accept".
To make the banner actually work as a gatekeeper, you need a way to tell GTM: "Stop what you're doing, the status has just changed!".
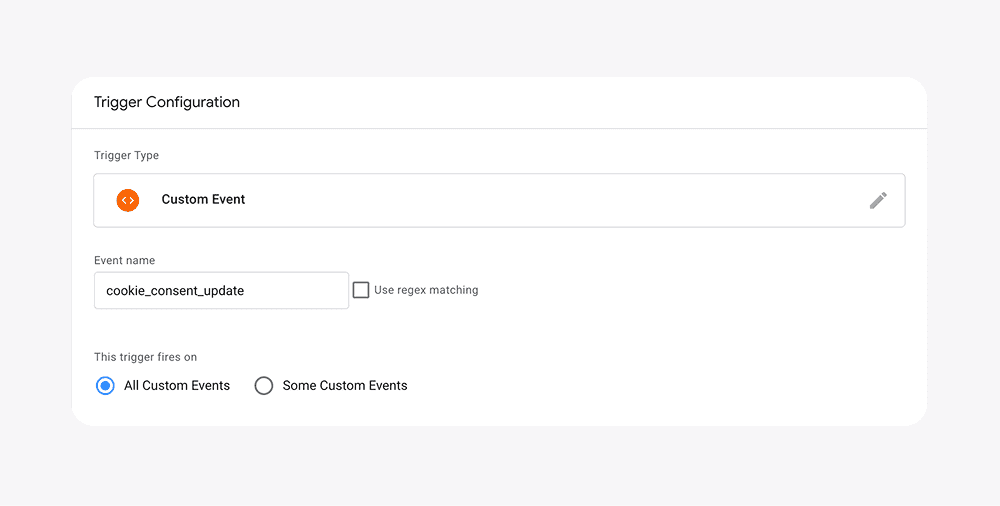
The fix: Framer sends a custom signal to the Data Layer the moment someone interacts with the banner. You need to capture this using a Custom Event trigger (in GTM: Triggers > New)
Event name:
cookie_consent_update
Why it’s crucial: This event acts as a manual "Go!" signal. It bypasses the fact that the page has already loaded and forces GTM to re-evaluate the tags. Without this, your tags will either ignore the banner entirely or won't fire at all until the user manually refreshes the page.
Cover both scenarios (The reload consistency)
To have a bulletproof setup, your tags need to handle two situations:
The First Click: User clicks accept -> Custom Event fires the tags immediately.
The Return Visit: User comes back (or reloads) -> Consent is already saved -> Initialization trigger fires the tags.
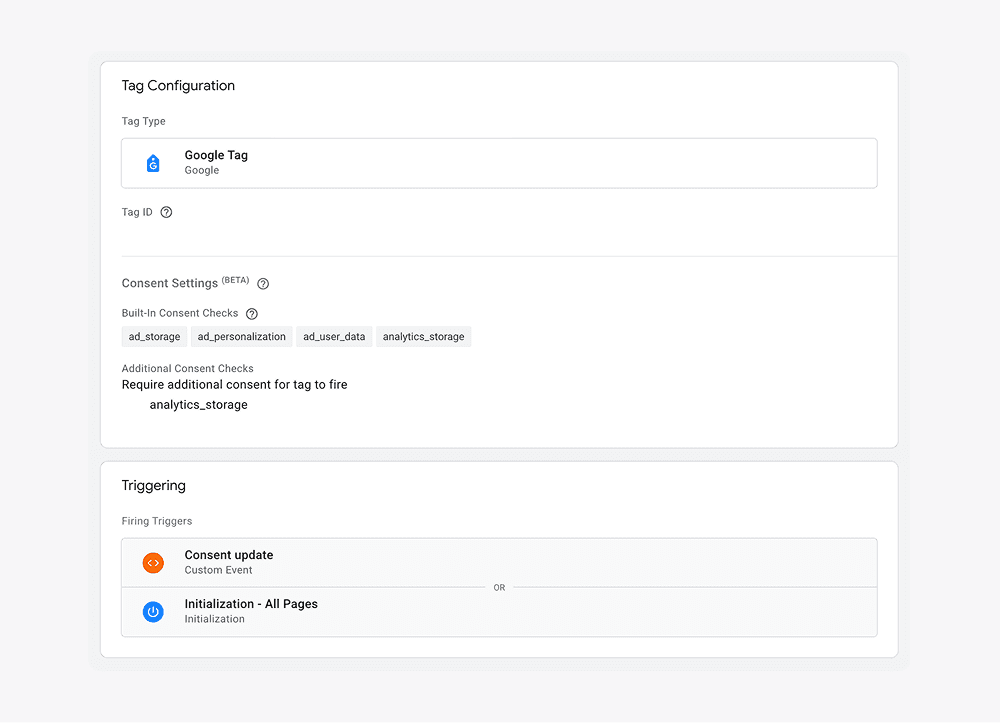
The correct configuration: Your tags (like GA4 or Clarity) should ideally have both triggers attached:
Initialization - All PagesEvent - cookie_consent_update
Final step: debugging
When testing your implementation in GTM Preview Mode, remember that the browser remembers your choice.
If you clicked "Accept" five minutes ago, GTM Preview might show tags firing perfectly on "Initialization," giving you a false sense of security. You might think it works for everyone, but it only works for you.
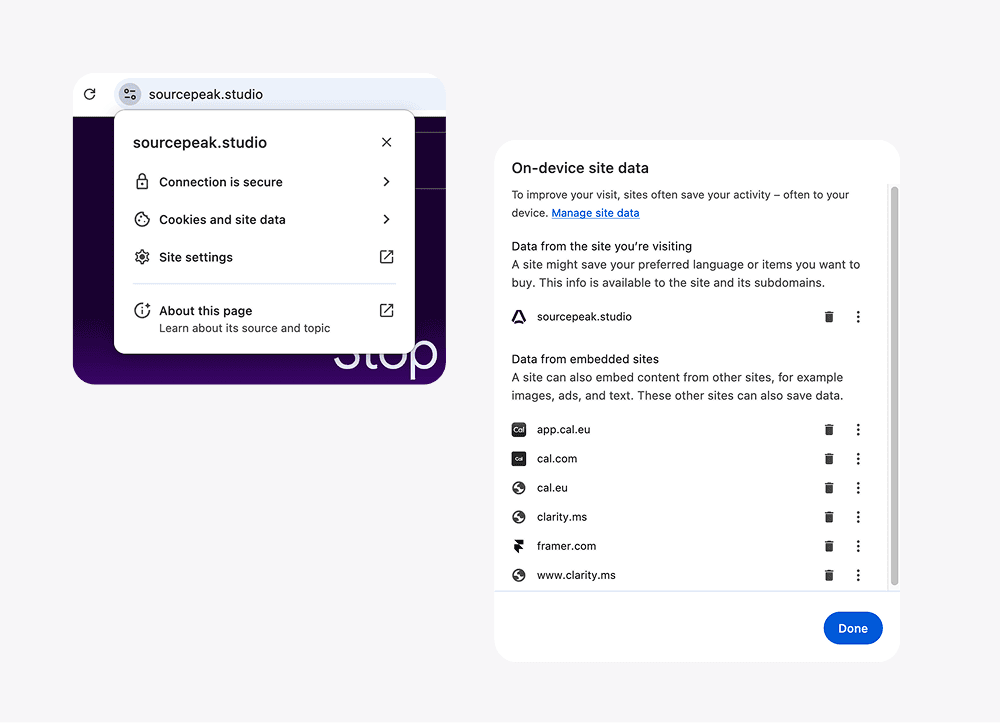
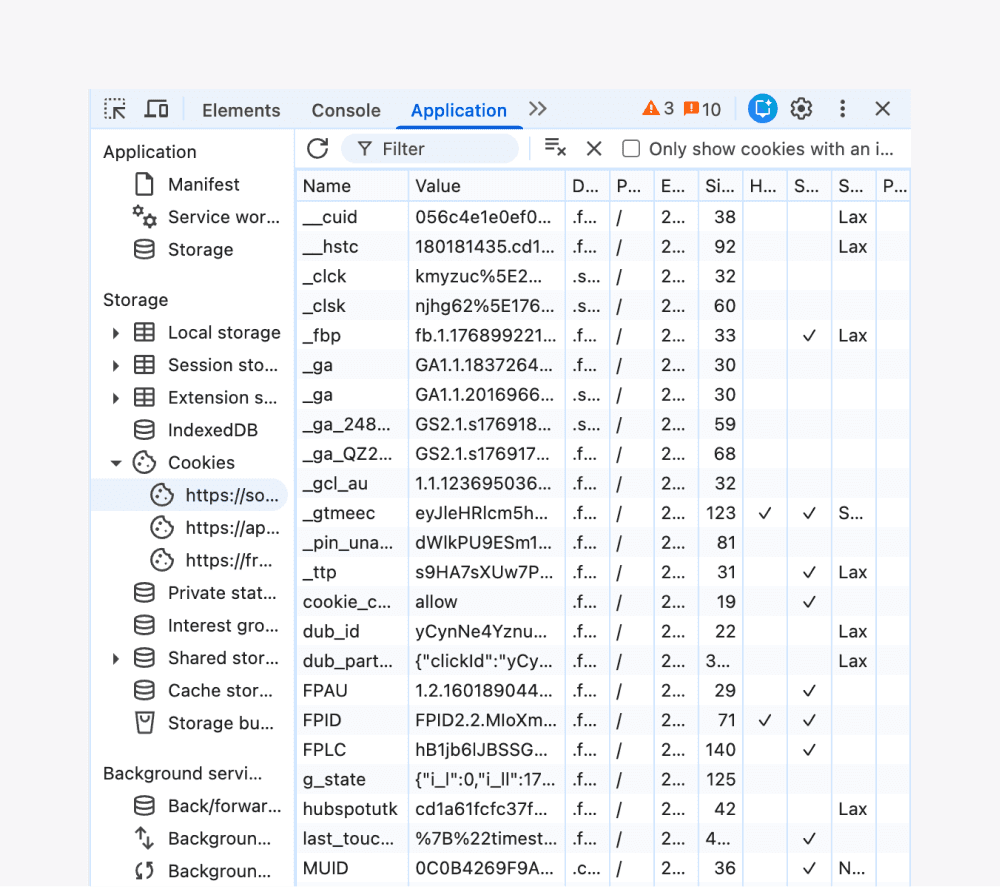
How to test properly: Always clear your cookies or test in Incognito mode. For a deeper check, don't just look at the GTM debug window. Inspect the Application tab in Chrome DevTools (F12) to verify if cookies like _ga are actually being created only after you grant consent.
Summary
Framer gives you the tools, but the logic is on you. By setting this up correctly, you ensure your analytics are accurate and compliant, without losing sleep over missing data.
Hope this guide saves you some debugging time!